Description
In our fourth lab, you and your partner will follow these instructions to build a D-Latch.
This is the last breadboard lab. At the end, please clear your breadboard. Place ALL electrical components in their appropriate drawers, being mindful of (a) the integrated circuit number and (b) the "front" and "back" notation on the drawer labels. Place all wires and other components in their appropriate containers. And place breadboards in the boxes. Do this in addition to the standard teardown procedure.
If you believe a component is defective, tell your TA.
Safety First
Be mindful of the current and voltage you are supplying to the circuit. You should be supplying 5V and keep current (A) at around 9 or 12 o'clock. No drinks on the working surface.
Procedures
Find your lab partner. Then:
- Clear your breadboard's logic circuit. Leave the input and output circuits in -- you are reusing these.
- Make sure you are using a ~4.7k resistor for each input an a ~1k resistor for each LED output.
- Talk to your partner about the S/R and D-Latch circuit design.
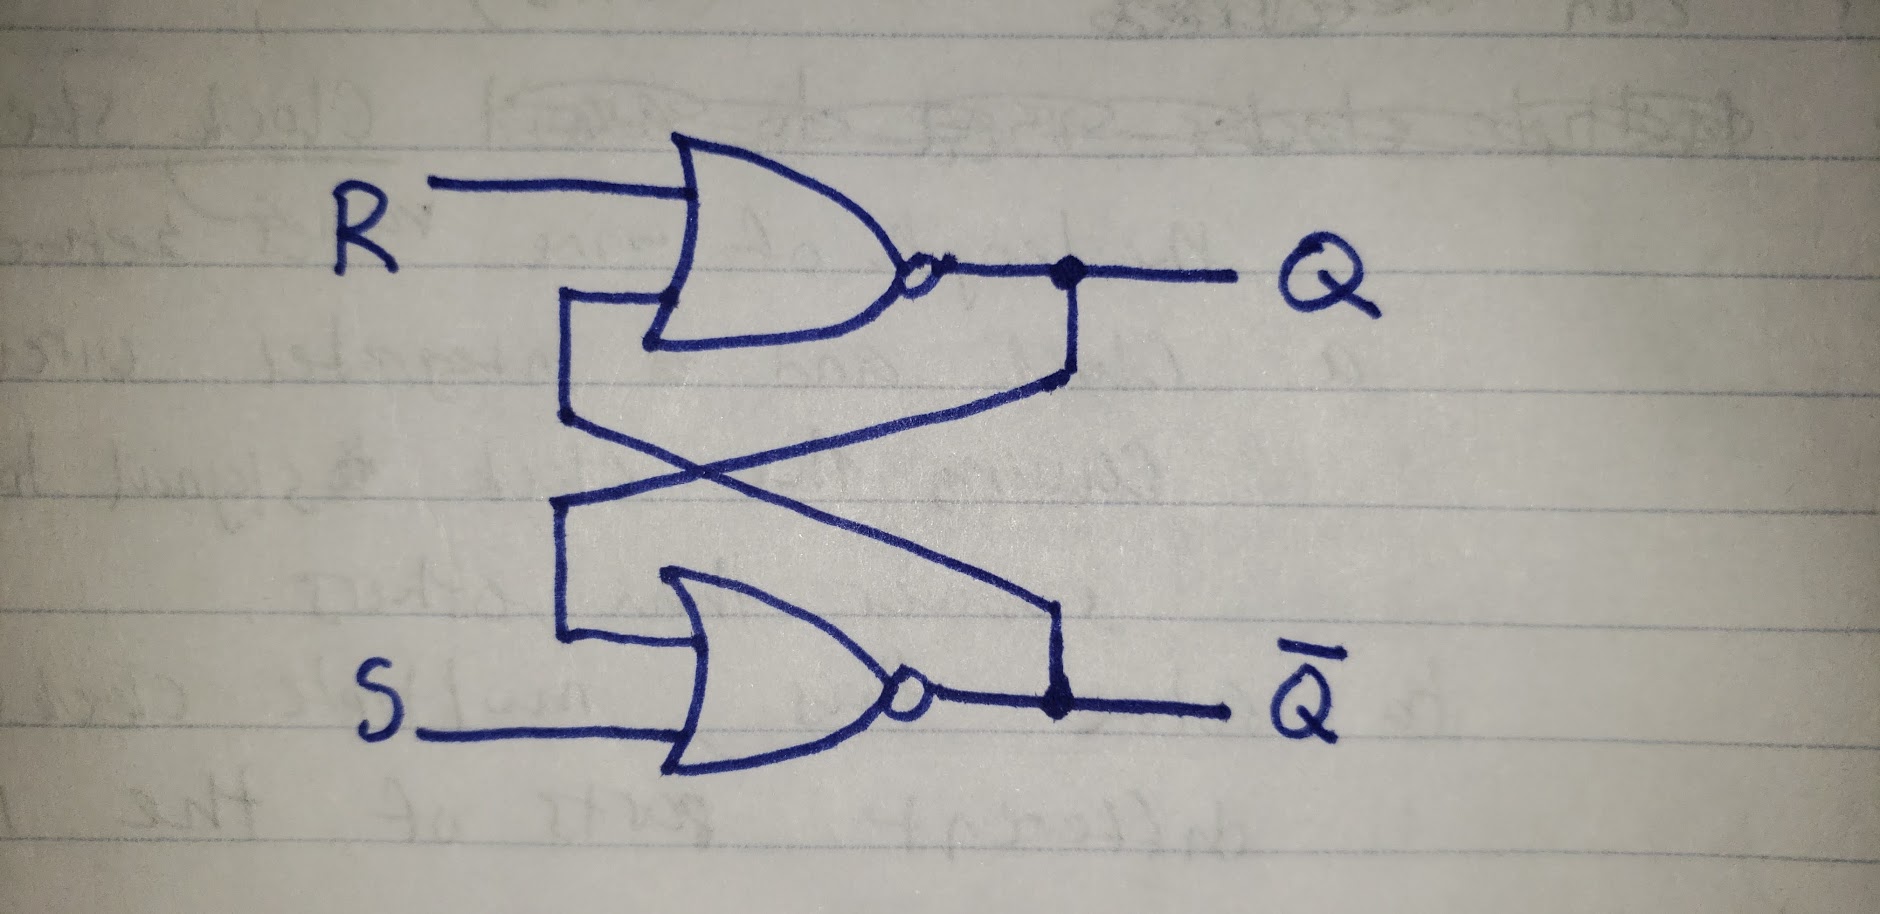
- Construct a S/R latch using NOR gates (see the schematic below or click here). For outputs, use two LEDs to represent both Q and Q̅.
- Remember to use short wires where you can -- this makes the TA's analysis easier.
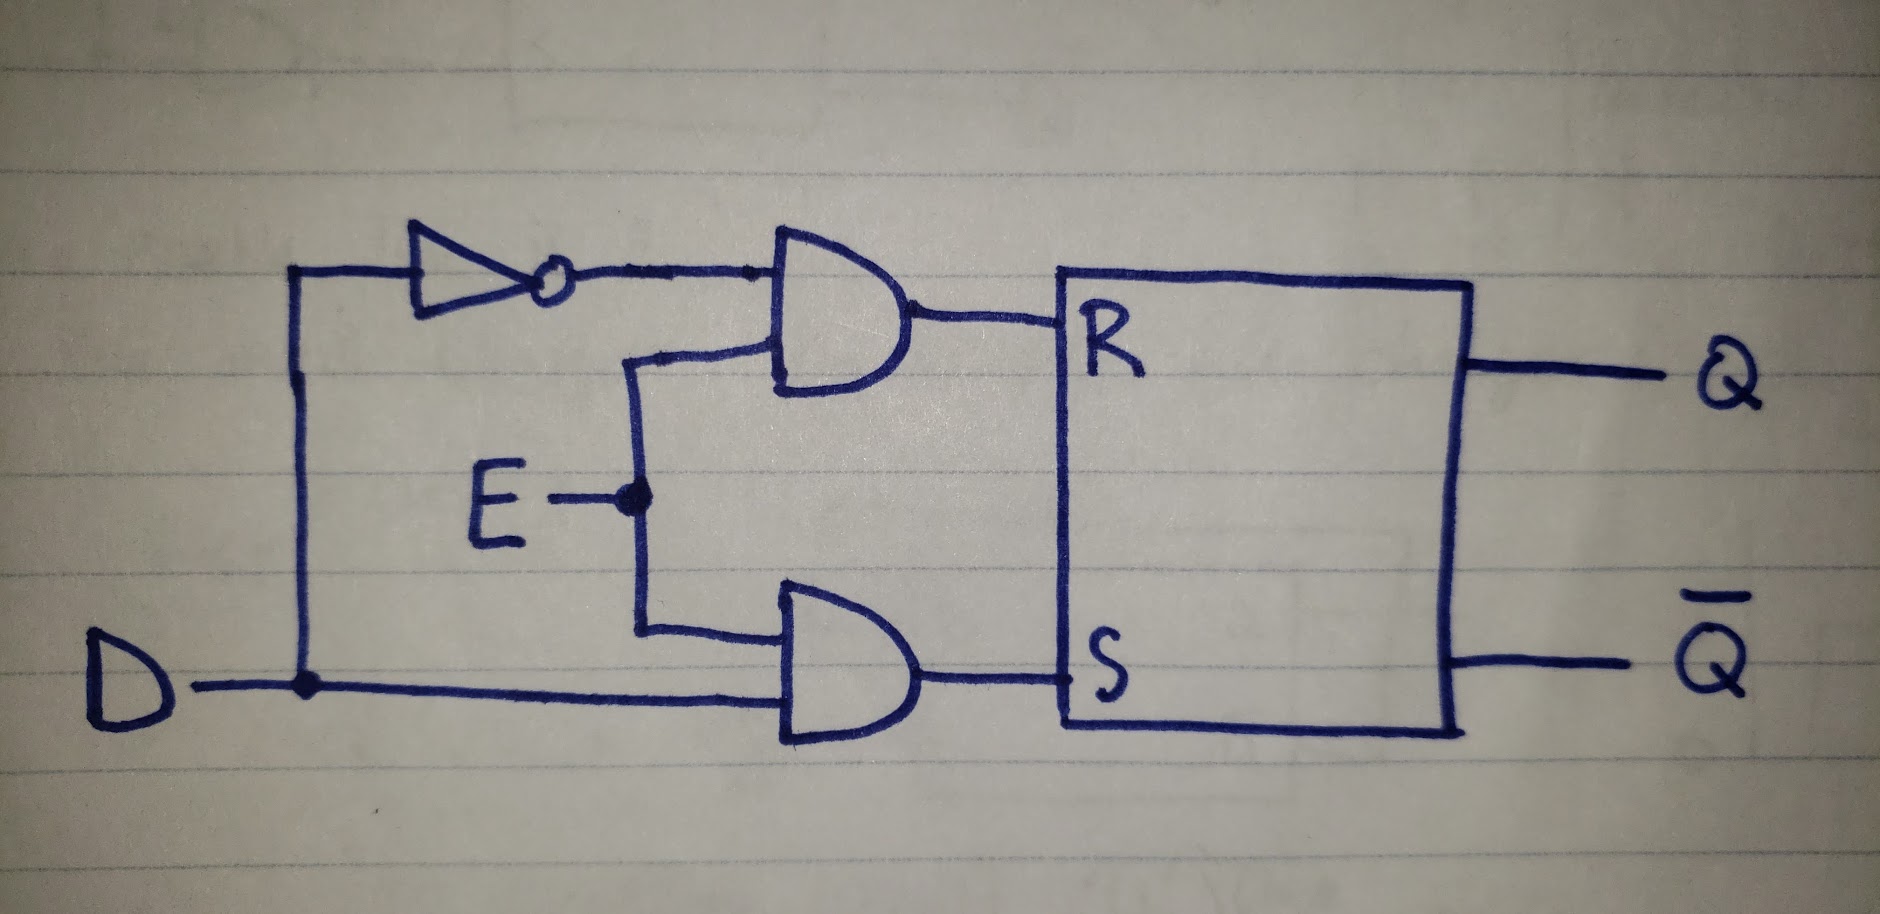
- Create a D-Latch by building on top of your S/R latch (see the schematic below or click here). Be mindful of the pinout difference between NAND and NOR gates.
- Show your demo to the TA.
- If you have any questions, your TA will be happy to answer them.
Helpful Diagrams
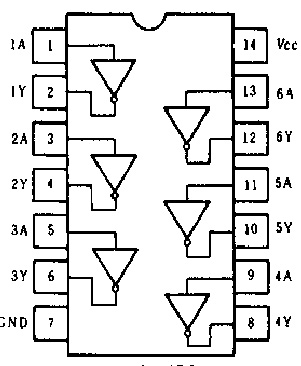
Be mindful of the notch on the integrated circuits. Counting counter-clockwise from the notch, pin 7 is ground, and pin 14 is power. This is standard across all 7400-series IC's.
REMEMBER: Always plug your integrated circuits into power (Vcc) and ground (GND) FIRST.
REUSE THE SAME INTEGRATED CIRCUIT: These 14-pin IC's have many logic gates in one!
74HC04 (NOT gate) pinout diagram
74HC08 (AND gate) pinout diagram
74HC02 (NOR gate) pinout diagram
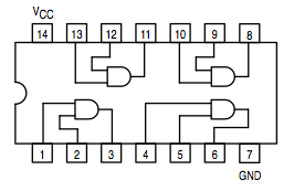
The notch would be located at the top of this diagram
S/R Latch Logic
D-Latch Logic
Once you are finished, show your demo to the present TA, who will assign your grade out of five. Remember, you can continue to improve your circuit and show unlimited demos to the TA. Your TA will guide you toward receiving full points.
Teardown
Unplug your power supplies and place them on the middle table. Place all PSU wires in their respective boxes. Place wire containers in the large cardboard box (containing wires and breadboards). Any unused components should be put away.
This is the last breadboard lab. Please clear your breadboard. Place ALL electrical components in their appropriate drawers and containers.